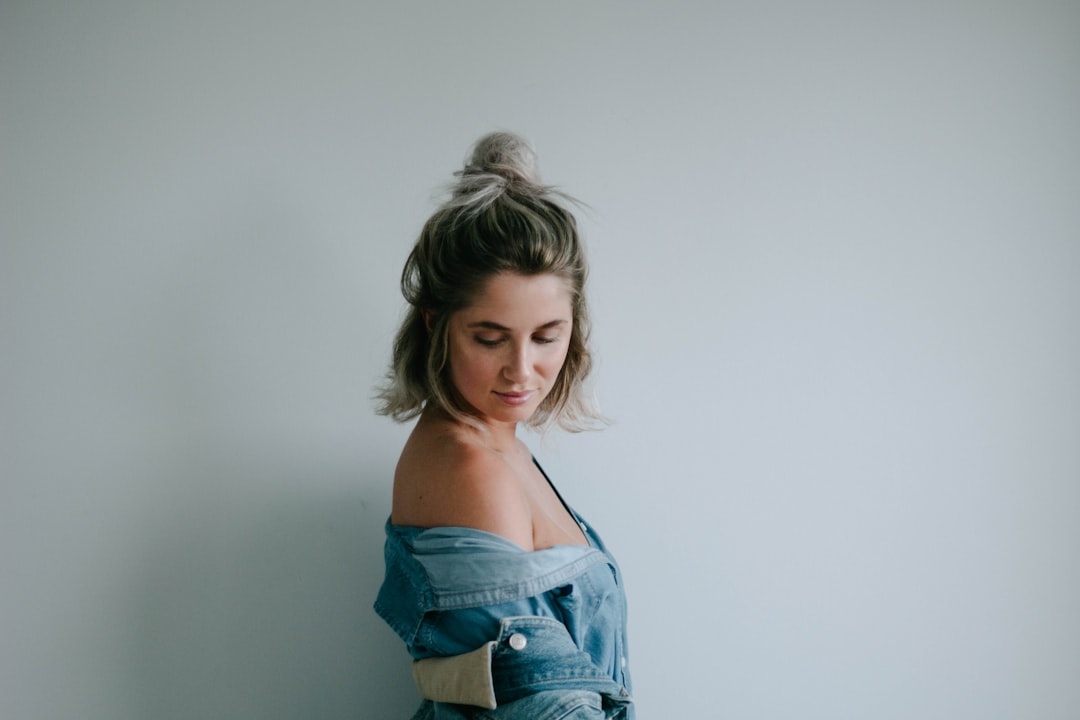
How to Do a Messy Bun with Short Hair: A Complete Guide
Contents:
- Why Short Hair and Messy Buns Are a Perfect Match
- Understanding Your Hair Type and Length
- Assessing Your Hair Texture
- Essential Products and Tools for Short Hair Buns
- Hair Donuts and Bun Makers
- Bobby Pins and Grips
- Texture and Hold Products
- Step-by-Step: Creating Your Messy Bun with Short Hair
- Preparation: Start with the Right Base
- Step 1: Determine Your Placement
- Step 2: Gather and Secure the Ponytail
- Step 3: Insert the Hair Donut
- Step 4: Wrap and Tuck
- Step 5: Pin Everything in Place
- Step 6: Tease and Texture
- Step 7: Spray and Final Adjustments
- Common Mistakes to Avoid with Short Hair
- Using the Wrong Size Donut
- Not Using Enough Pins
- Creating a Bun That’s Too Full
- Starting with Clean, Product-Free Hair
- Pulling Your Hair Too Tight
- Comparing Messy Buns to Other Short Hair Upstyles
- Messy Bun vs. Half-Up Style
- Messy Bun vs. Top Knot
- Styling Ideas and Variations
- The Braided Messy Bun
- The Low Messy Bun with Wispy Pieces
- The Twisted Messy Bun
- Maintaining Your Messy Bun Throughout the Day
- Frequently Asked Questions
- Can I make a messy bun with 5cm hair?
- How do I keep my messy bun from looking too structured?
- What’s the best product for holding a messy bun in place?
- Can I create a messy bun with curly or coily hair?
- How often should I wash my hair if I’m styling messy buns regularly?
- Making the Style Your Own
Surprisingly, only 34% of people with shorter hair lengths attempt upstyles, yet most of them abandon the idea after a single failed attempt. The truth is that a messy bun doesn’t require long, thick locks. With the right technique and a few clever tricks, you can create a chic, effortless-looking bun that works brilliantly with short hair.
The fastest way to create a messy bun with short hair is to use a hair donut (also called a bun maker) combined with bobby pins and texturising spray. Gather your hair at the crown or the nape of your neck depending on your hair length, thread it through the donut, wrap the ends around it, secure with pins, and use a texture spray to catch flyaways. The whole process takes 3-5 minutes once you’ve practised.
Why Short Hair and Messy Buns Are a Perfect Match
Most people assume that buns require long, flowing hair. This misconception stops them from experimenting with one of the most versatile upstyles available. Short hair actually offers distinct advantages when creating a messy bun: it’s faster to style, requires less product, and the tighter texture often holds the style longer throughout the day.
Messy buns gained significant popularity after 2015, with Pinterest searches for the style increasing by 340% in that year alone. What made the style so appealing was its casual, deliberately undone nature, which made it forgiving for everyday wear. For short hair, this approach is even more beneficial because perfection isn’t the goal.
The key difference between a messy bun for long hair versus short hair lies in the placement and the supporting techniques you’ll use. With longer hair, gravity helps keep everything in place. With shorter hair, you’ll rely on clever positioning, grip products, and strategic pinning.
Understanding Your Hair Type and Length
Before you attempt your first messy bun, assess what you’re working with. Short hair typically falls into three categories: pixie and very short cuts (under 5cm), shoulder-length bobs (10-15cm), and shoulder-brushing lengths (15-20cm).
If your hair is longer than 10cm, you’ve got plenty to work with. Hair between 8-10cm is the trickier zone—it’s long enough to gather but might not have the weight for a traditional bun. Hair shorter than 8cm will require a different approach altogether, such as using hair extensions or opting for alternative upstyles like small twists or braids.
Assessing Your Hair Texture
Your hair’s natural texture plays a crucial role in how easily you can create and maintain a messy bun. Fine, slippery hair requires more grip products and may need additional pins. Thick, coarse hair holds styles more easily but can look bulky if you create too full a bun. Wavy or curly hair is actually ideal for messy buns because the texture naturally catches and holds pins beautifully.
If you have very slick hair, a texture spray is non-negotiable. Brands like Batiste (around £4.50 for a 200ml bottle) or Not Your Mother’s Beach Spray (approximately £5.99) provide excellent grip without weighing hair down. These products work by coating each strand with microscopic particles that create friction between hairs, making them stick together.
Essential Products and Tools for Short Hair Buns
You don’t need a fancy arsenal to create a messy bun, but having the right tools makes the process significantly easier.
Hair Donuts and Bun Makers
A hair donut is your single most useful tool for short hair buns. These ring-shaped pieces of foam or fabric come in different diameters, typically ranging from 5cm to 8cm. For short hair, choose a smaller donut—the 5cm size works best for most people with hair between 8-15cm in length.
Purchase a quality donut for around £3-£7. Budget options from Superdrug or Boots are perfectly functional. The donut provides the structure that replaces volume, making it possible to create a defined bun even when you don’t have much hair.
Bobby Pins and Grips
Invest in proper bobby pins rather than the cheap multipacks found at pound shops. Quality pins from brands like Sleek or Wella (usually £2-£4 for a 50-pin box) have better grip and won’t slip out during the day. For short hair, you’ll typically need 5-8 pins per bun.
Elastics matter too. Use thin, fabric-covered elastics rather than standard rubber bands. They grip hair better and cause less damage. A pack of these costs around £1.50-£2.50.
Texture and Hold Products
A good dry texture spray is essential for short hair buns. It provides grip, improves hold, and keeps flyaways in check. Budget around £4-£8 for a decent bottle that will last 2-3 months with regular use.
Alternatively, a light hairspray works if you don’t want to invest in multiple products. Just avoid heavy mousses or gels that can weigh short hair down and make it look greasy.
Step-by-Step: Creating Your Messy Bun with Short Hair
Preparation: Start with the Right Base
Freshly washed hair is too slippery for a bun. Ideally, style your bun on day two or three after washing, when your hair has some natural oils and texture. If you’re working with freshly washed hair, apply a dry texture spray throughout your hair and let it sit for 30 seconds.
Brush your hair gently to remove tangles, but don’t make it too smooth. A little texture and slight waves actually help your bun hold better. If you have very straight hair, consider using a texturising spray or even light braiding the night before to add grip.
Step 1: Determine Your Placement
With short hair, placement is critical. You have two main options:
- Crown placement: Gather hair at the very top of your head, roughly where a crown would sit. This works best if you have hair at least 10cm long and want a more playful, youthful look.
- Nape placement: Gather hair lower, at the back of your neck. This works for shorter lengths (8-10cm) and creates a more sophisticated appearance.
For your first attempt, try nape placement as it’s easier to manage and requires less hair volume.
Step 2: Gather and Secure the Ponytail
Using a fine-tooth comb, gather all your hair towards your chosen spot. Don’t aim for a tight, sleek ponytail—that’s the opposite of what you want for a messy bun. Instead, gather it loosely and secure with a thin elastic at the base. Your ponytail should feel slightly loose and relaxed.
Aim for a tension of around 4 out of 10. Too tight will create stress on your scalp and make the bun look stiff; too loose and everything falls apart within an hour.
Step 3: Insert the Hair Donut
Thread your ponytail through the centre of the hair donut. If you’re using a 5cm donut, it should sit about 2-3cm below the elastic. Position it so the donut is centred within your ponytail.
Flip your ponytail up and over the donut so the hair surrounds it completely. This takes practice—don’t worry if it’s uneven on your first few attempts.
Step 4: Wrap and Tuck
Take small sections of hair from your ponytail and wrap them around the base of the donut, covering it completely. As you wrap, tuck the ends under and around the donut. This is where the “messy” part happens—you want pieces going in slightly different directions, not a perfectly neat wrap.
Aim to wrap your ponytail around the donut 1.5 to 2 times. Don’t expect every piece to wrap perfectly; some will stick out, and that’s exactly what you want.
Step 5: Pin Everything in Place
This is the crucial step for short hair stability. Take your bobby pins and insert them through the wrapped sections and into the donut base. You’ll need more pins for short hair than long hair—typically 6-8 pins versus the 3-4 used for longer styles.
Insert pins at different angles: some horizontally, some at a slight diagonal. This creates a stronger hold. You should feel slight resistance as each pin goes in, indicating it’s catching both hair and the donut structure.
Step 6: Tease and Texture
Using a fine-tooth comb or a teasing brush, gently backcomb the outer sections of your bun to create texture and make it look fuller. Work in small sections, teasing just the surface layer rather than the entire section. This typically takes 1-2 minutes.
Once you’ve teased, smooth the teased sections lightly with your comb so it looks intentionally messy rather than accidentally tangled. This balance is key.
Step 7: Spray and Final Adjustments
Apply a light mist of texture or hairspray over the entire bun from several angles. Don’t saturate it—you’re looking for a light coating that will help set everything in place and keep flyaways under control throughout the day.
Pull out a few small pieces of hair around your face and at the nape of your neck to create a softer, less structured appearance. These face-framing pieces are what make a bun look intentionally messy rather than like an emergency updo.
Common Mistakes to Avoid with Short Hair
Using the Wrong Size Donut
A donut that’s too large creates an obviously fake-looking, overstuffed bun. A donut that’s too small won’t provide enough structure. If you buy a standard 7cm donut and it doesn’t work, try a 5cm version. The size difference seems small but makes a significant difference in how realistic your bun looks.
Not Using Enough Pins
Short hair is lighter and less stable than long hair. If you use the standard 3-4 pins recommended for longer styles, your bun will collapse within an hour. Add at least 2 extra pins—you need a minimum of 5 pins for short hair buns, preferably 6-8.
Creating a Bun That’s Too Full
The temptation with short hair is to make the bun look as full and voluminous as possible. Resist this. A bun that’s too full looks obviously fake and will slip throughout the day. Your bun should be roughly the size of a small apple or a tennis ball, not a grapefruit.
Starting with Clean, Product-Free Hair
Clean hair is slippery. It’s the enemy of messy buns. If you must use freshly washed hair, apply a texture spray first and let it dry completely before styling. Better yet, wait 24-48 hours after washing.
Pulling Your Hair Too Tight
A tight ponytail creates tension that pulls your bun apart throughout the day. It also looks too polished and structured, defeating the purpose of the “messy” aesthetic. Your initial ponytail should feel almost floppy.
Comparing Messy Buns to Other Short Hair Upstyles
Confused about whether a messy bun or a different upstyle would work better for your hair? Here’s how they compare:
Messy Bun vs. Half-Up Style
A half-up style leaves most of your hair down while gathering the top half. It requires less hair volume and is easier for very short lengths (5-8cm). However, it offers less of an “off-the-face” feel and tends to slip throughout the day without proper grips or braiding. A messy bun, by contrast, keeps all hair off your face and holds better once properly pinned, though it does require more length and more pins.
Messy Bun vs. Top Knot
Top knots sit higher on the head and typically look more structured and intentional. Messy buns sit lower and deliberately avoid looking polished. Top knots work beautifully on very short hair (5-8cm) as they don’t require as much volume, whilst messy buns need at least 8-10cm to look right. If you’re aiming for a playful, casual vibe, choose a messy bun; if you prefer something more fashion-forward and structured, try a top knot.
Styling Ideas and Variations
The Braided Messy Bun
Braid a small section of your hair before gathering it into a ponytail. The braid adds texture and visual interest, making the overall style look more intentional. This variation works particularly well for fine hair that struggles to hold a traditional messy bun shape.
The Low Messy Bun with Wispy Pieces
Position your bun extremely low, just above the nape of your neck, and leave several small pieces free around your face and temples. This creates an ultra-soft, romantic look that works for both casual and dressier occasions. It’s ideal for people with delicate facial features or who prefer a feminine aesthetic.
The Twisted Messy Bun
Instead of gathering your hair straight back, divide it into two sections and twist each section, then wrap the twists around your donut. This creates texture without needing to backcomb, and it often holds better throughout the day because the twists lock everything in place.
Maintaining Your Messy Bun Throughout the Day
A proper messy bun should last 6-8 hours before needing adjustment. To extend the life of your style:
- Avoid touching your bun constantly. Every adjustment creates loose strands and weakens the pins’ grip.
- If pieces start slipping, rather than re-doing the whole bun, use a bobby pin to secure just the loose section.
- For evening events, apply a light hairspray mid-afternoon to refresh the hold without making your hair feel stiff or sticky.
- Sleep on your bun if you’re styling it for the next day. This keeps the shape whilst adding extra texture.
- In humid conditions, the bun may loosen slightly. A travel-sized texture spray in your bag helps maintain hold.
Frequently Asked Questions
Can I make a messy bun with 5cm hair?
Technically, yes, but you’ll need to use hair extensions or clip-in pieces. Without extensions, hair shorter than 8cm doesn’t have enough length to wrap around a donut properly. If you’re committed to the upstyle look with very short hair, consider a small twisted bun without a donut, or explore top knots and small buns that sit flat against your head.
How do I keep my messy bun from looking too structured?
Pull out several small pieces of hair around your face and nape before spraying. Avoid making your initial ponytail tight. Tease the bun to add texture. Use a light hairspray rather than a heavy one. If your bun still looks too neat after these steps, gently pull and loosen the outer sections with your fingers until it reaches the level of messiness you want.
What’s the best product for holding a messy bun in place?
For most people, a dry texture spray is the best choice. It provides grip without weight and is less likely to make your hair feel stiff or sticky. Alternatively, a light hairspray works well. Avoid mousses, gels, and heavy pomades, which can weigh short hair down and make it look greasy. Budget around £4-£6 for a good texture spray that will last several months.
Can I create a messy bun with curly or coily hair?
Yes, curly and coily hair actually creates beautiful messy buns because the natural texture provides excellent grip. You may need fewer pins than straight-haired people. However, you’ll want to use products designed for curls, such as a curl-defining spray or a light curl cream, rather than traditional texture sprays. Your curls will naturally provide the messiness you’re after.
How often should I wash my hair if I’m styling messy buns regularly?
Aim to style messy buns on day 2-3 after washing. Frequent messy buns may lead to more regular hair washing (every 2-3 days rather than every 5-7 days) because you’re adding texture products and pins daily. To protect your hair and scalp health, alternate between days you wear a bun and days you wear your hair down. If you notice your scalp becoming oily or irritated, reduce bun styling to 2-3 times per week.
Making the Style Your Own
Creating a messy bun with short hair is entirely achievable once you understand the mechanics of the style and invest in a few key tools. The secret isn’t having long hair—it’s using the right techniques, proper pinning, and embracing the intentional imperfection that makes the style so appealing.
Your first attempt might be wobbly or uneven. That’s perfectly normal. By your third or fourth try, you’ll develop the feel for the right tension and positioning. Within a week or two, you’ll be able to create a polished messy bun in under five minutes without thinking about each step.
Start by gathering your hair this week. Grab a small donut from Boots or Superdrug for under £5, pick up quality bobby pins, and apply a texture spray. Try the nape placement first, follow the steps, and give yourself grace with the learning curve. Within a few attempts, you’ll have added a genuinely useful upstyle to your hair routine—no long locks required.