How to Balayage Hair: The Complete Technique Guide
Contents:
- What is Balayage and Why It’s Different from Highlights
- Understanding Your Hair Type and Current Colour
- Essential Supplies and Products You’ll Need
- Lightening Products
- Sectioning and Application Tools
- Protection and Aftercare
- Sectioning Techniques for Optimal Results
- The Standard Four-Section Method
- The Parting Approach
- Step-by-Step Application Process
- Preparation (15 minutes before mixing)
- Application Technique
- Processing and Monitoring
- Rinsing and Conditioning
- Regional Variations in Balayage Trends
- Seasonal Timing and Maintenance Calendar
- Spring (March-May)
- Summer (June-August)
- Autumn (September-November)
- Winter (December-February)
- Common Mistakes to Avoid
- Over-Processing
- Uneven Developer Strength
- Neglecting Roots and Ends Differently
- Insufficient Deep Conditioning
- How to Tone Balayage for Your Ideal Result
- Maintenance: Keeping Your Balayage Fresh
- Weekly Routine
- Quarterly Protein Treatments
- Professional Maintenance
- Balayage for Different Hair Types and Colours
- Fine or Thin Hair
- Thick or Coarse Hair
- Curly or Textured Hair
- Dark Hair (Levels 1-4)
- Previously Lightened Hair
- Frequently Asked Questions
- How long does at-home balayage take?
- Can I do balayage on damaged hair?
- What’s the difference between balayage and highlights?
- How often should I get balayage refreshed?
- Can I do balayage at home safely?
- Conclusion: Mastering How to Balayage Hair
The desire to achieve sun-kissed, dimensional colour without the commitment of a full head of highlights drives thousands of people to search for balayage techniques each month. You’ve likely seen stunning before-and-afters on social media—those effortlessly blended, natural-looking streaks that seem to catch the light perfectly. The frustration sets in when you realise the process isn’t actually a single technique, but rather a sophisticated skill combining colour theory, sectioning knowledge, and application finesse. Learning how to balayage hair yourself can save hundreds of pounds and give you control over your results, but it requires understanding the underlying principles first.
What is Balayage and Why It’s Different from Highlights
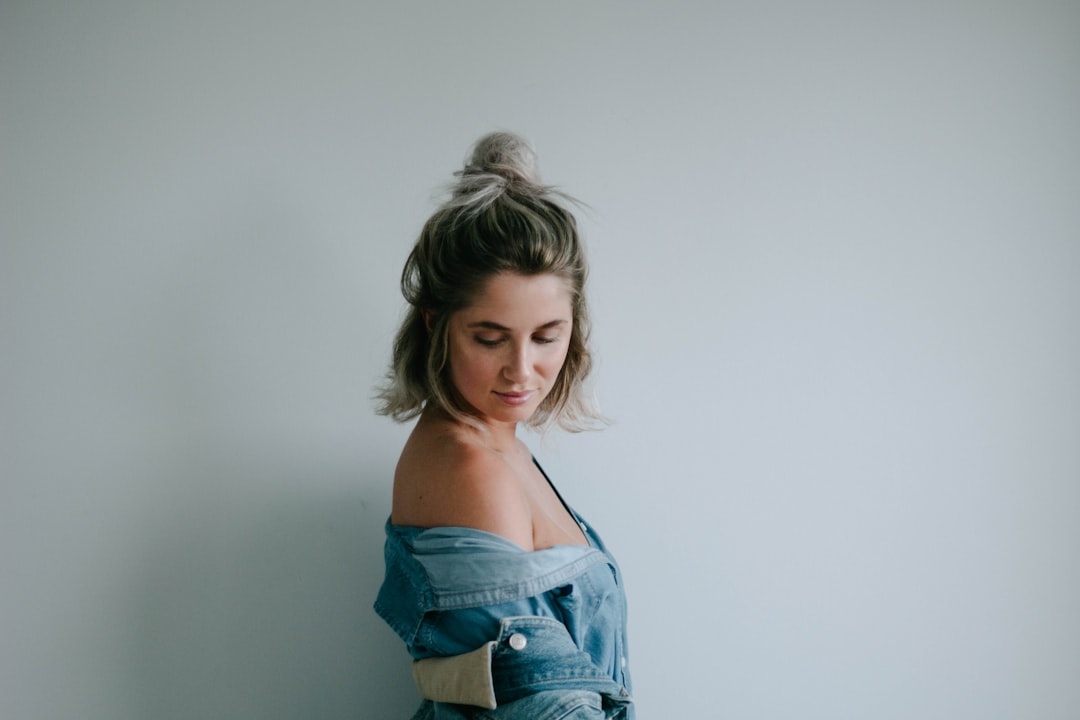
Balayage, derived from the French word meaning “to sweep,” fundamentally differs from traditional highlighting methods. Rather than using foils or caps to isolate hair sections, balayage involves hand-painting colour directly onto hair strands. This freehand approach creates dimension that grows out naturally, avoiding the harsh root lines associated with foil highlights.
The key distinction lies in colour saturation and placement. Traditional highlights typically saturate a full section from root to tip, creating uniform bands. Balayage concentrates colour along the mid-lengths and ends, leaving the roots darker. This creates a gradient effect that mimics how natural hair lightens from sun exposure. The technique originated in France during the 1970s and has become the gold standard in contemporary colouring.
Scientifically, this approach works with your hair’s natural light-reflection properties. Hair doesn’t reflect light uniformly; lighter pieces positioned strategically catch and scatter light more effectively than uniformly coloured hair. This is why balayage appears more expensive and salon-quality than block highlighting—it’s engineered to work with light itself.
Understanding Your Hair Type and Current Colour
Before applying any lightening product, assess three critical factors: hair porosity, texture, and current colour depth. These determine processing time, developer strength, and whether your hair can safely handle lightening.
Hair porosity—the hair’s ability to absorb and retain moisture—directly affects colour uptake. High-porosity hair absorbs colour faster and lighter, making it ideal for balayage but requiring shorter processing times (15-20 minutes). Low-porosity hair resists colour penetration and needs 30-40 minutes or a 20 volume developer instead of 10 volume. Medium-porosity hair (the most common type) processes predictably in 25-30 minutes.
Texture matters equally. Fine, silky hair processes faster and shows lighter results with the same developer strength. Coarse, textured hair requires longer processing and may need a stronger developer. Asian hair types often demonstrate very high density and can handle stronger lightening, whilst finer European hair types may need gentler processing.
Current colour depth follows the industry’s 1-10 scale, where 1 is black and 10 is the lightest blonde. For balayage success, understand your starting point. Hair at level 4 (dark brown) can achieve blonde balayage but requires careful processing. Hair at level 7 (medium blonde) can reach pale, buttery tones easily. Attempting balayage on level 1 or 2 hair risks excessive damage—professional consultation becomes essential at these depths.
What the Pros Know: Professional colourists perform a strand test 48 hours before application, checking not just the final colour but hair strength and elasticity. They also assess scalp sensitivity, as lighter developers can irritate sensitive scalps. Always perform a 24-hour patch test behind your ear and a 48-hour strand test on a hidden section. These steps prevent allergic reactions and reveal processing time accurately.
Essential Supplies and Products You’ll Need
Balayage requires specific supplies beyond standard hair colour kits. Professional-quality products deliver superior results to box dyes, though the investment is higher.
Lightening Products
Powder bleach (or lightening powder) forms the foundation. Purchase professional-grade powder, typically £8-15 per 500g tub. Brands like Wella Blondor, Schwarzkopf Igora Vario, and Matrix Ultra Blonde are industry standards. Generic powder bleach often contains harsh ammonia concentrations damaging to hair.
Developer strength is measured in volumes: 10, 20, 30, and 40. The higher the volume, the faster and lighter the lift, but with increased damage risk. For balayage, 10 or 20 volume developer works best. 10 volume processes gently over 30-40 minutes and suits previously lightened hair. 20 volume processes in 20-30 minutes and works for virgin (never lightened) hair. Never use 30 or 40 volume for balayage—the unpredictable hand-painted application makes strong developers risky.
Sectioning and Application Tools
Invest in quality sectioning clips (£4-8 for a set of 4-6). Plastic clips heat-resistant to at least 80°C are essential. Metal clips conduct heat and can cause uneven processing.
Balayage brushes differ from standard highlighting brushes. Wide, flat paddle brushes (2-3 inches wide) allow sweeping motions across hair sections. Thin, precise angled brushes (½-1 inch) create fine detail work. Purchase both; expect £6-12 each. Some professionals prefer old toothbrushes for creating fine, scattered highlights.
Mixing bowls must be non-metal—plastic or ceramic only, as metal reacts with peroxide. A glass or plastic applicator bottle helps control lightener distribution (£3-5).
Protection and Aftercare
Vaseline or barrier cream prevents lightener from staining skin. Disposable gloves protect hands from staining (bleach oxidises skin temporarily, creating orange discolouration). Old towels you don’t mind staining are essential; bleach discolours fabric permanently.
Post-balayage care requires colour-safe shampoo, deep conditioning treatment, and purple shampoo (for blonde balayage). Budget £12-20 for a professional colour-care system.
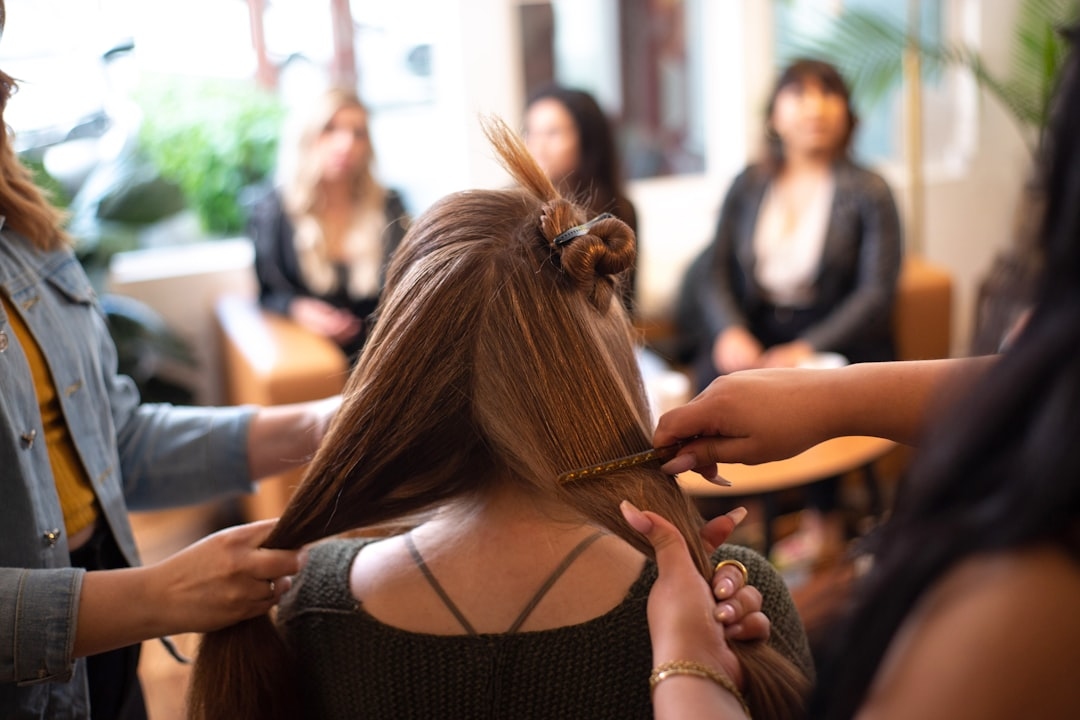
Sectioning Techniques for Optimal Results
Strategic sectioning determines whether your balayage looks professionally executed or patchy. Divide hair into sections that allow thorough coverage without overwhelming yourself.
The Standard Four-Section Method
Create a vertical line from your forehead through the crown to the nape. Then create a horizontal line from ear to ear across the crown. This creates four quadrants. Most balayage concentration occurs in the two back sections, with lighter application in the front sections (where sun exposure is most visible).
The Parting Approach
Some professionals use horizontal parting, creating 3-4 horizontal sections from crown to nape. This approach suits thicker hair and allows precise control over lightness gradation. Each section processes independently, preventing over-processing at the roots whilst ensuring adequate lightening at the ends.
Whichever method you choose, clip away sections you’re not working on. Working on one section at a time prevents product from drying on unprocessed areas and ensures even results.
Step-by-Step Application Process
Preparation (15 minutes before mixing)
Don’t wash hair for 2-3 days before balayage. Natural oils protect your scalp and reduce irritation. On the day, section dry hair thoroughly. Put on protective gear: gloves, old clothes, and a towel around your shoulders.
Mix lightening product according to package directions (typically 1:2 powder-to-developer ratio). Stir thoroughly for 1-2 minutes until the consistency resembles yogurt. If it’s too thick, the brush won’t glide smoothly. Too thin, and it drips unevenly.
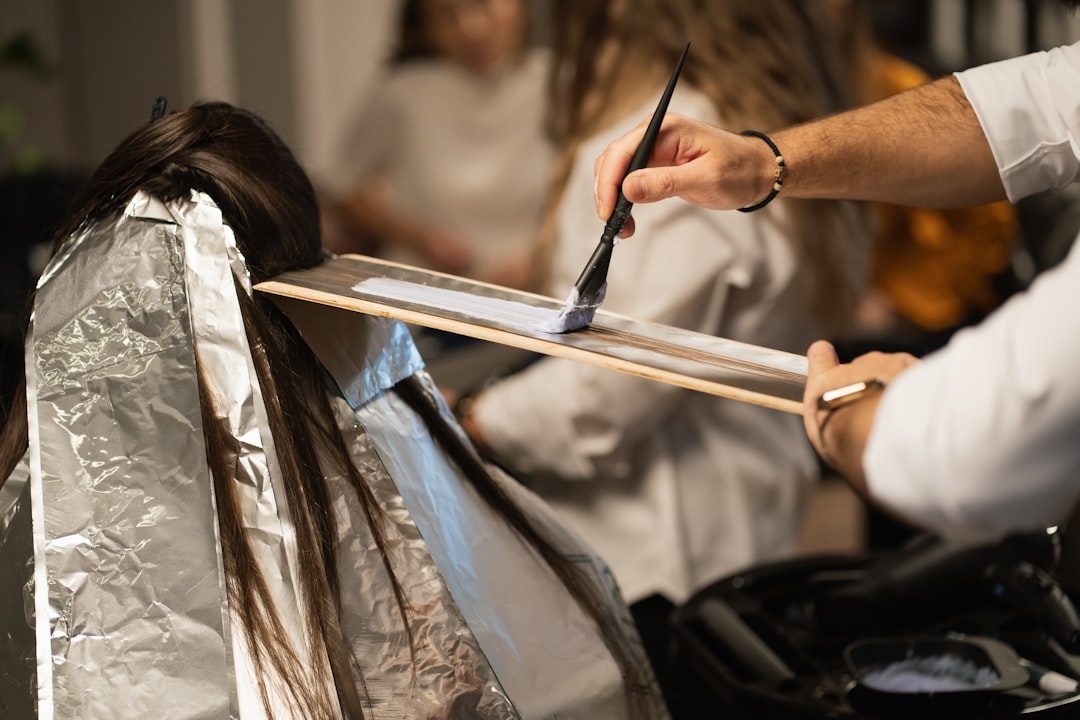
Application Technique
Begin with the back sections where you want the most dramatic lightening. Hold a section of hair horizontally. Using your paddle brush, paint lightener onto the mid-section of hair (approximately 1-2 inches from the roots). Use a sweeping motion, following the hair’s natural wave. Don’t paint every strand—aim for 40-60% coverage within the section.
After coating the mid-sections, refresh the brush with fresh lightener and paint the ends. Work from underneath, which is where balayage should be lightest. The roots remain unbleached, creating that coveted natural shadow.
Work methodically through each section. The entire application typically takes 20-30 minutes. Timing matters—lightener begins processing immediately, and uneven application times create uneven results.
Processing and Monitoring
Set a timer for 20 minutes (if using 20 volume) or 30 minutes (if using 10 volume). Check processing every 5 minutes after 15 minutes. Hair won’t lighten evenly; ends lighten faster than mid-sections due to thinner cuticles.
The goal is reaching your target lightness level before damage occurs. Professional colourists aim for target lightness in 30-35 minutes. If hair isn’t light enough at 40 minutes, stop processing—further lightening damages the hair structure significantly.
Rinsing and Conditioning
Rinse with lukewarm (not hot) water until water runs clear. Hot water opens hair cuticles, allowing precious moisture to escape. Apply a colour-safe shampoo, working it gently through lightened areas. Follow immediately with deep conditioning treatment, leaving it on for 5-10 minutes. This step is non-negotiable—it replaces moisture lost during bleaching.
Regional Variations in Balayage Trends
Balayage preferences vary significantly across the UK and internationally. Northeast trends favour cooler, ashier tones with subtle dimension—think champagne blonde with cool beige lowlights. This aesthetic suits cooler undertones common in that region and complements cooler seasonal lighting.
Southern regions, particularly areas with consistent sunshine, favour warmer, sunnier balayage. Honey blonde, caramel, and warm brown balayage are preferred, creating that “I’ve just returned from holiday” appearance year-round. West Coast trends (internationally speaking) lean toward lived-in, textured balayage with significant tonal variation—sometimes 3-4 different shades within one head for maximum movement.
Understanding your region’s aesthetic helps you choose undertones that feel natural within your community and complement typical seasonal lighting. A honey blonde balayage looks stunning during summer months but can appear muddy under winter’s blue-grey light in northern climates, whilst cool ash balayage can appear washed-out under warm summer sun in southern regions.
Seasonal Timing and Maintenance Calendar
Balayage maintenance varies dramatically by season. In 2026, professional balayage typically costs £120-280 depending on hair length and complexity. To preserve investment, understand seasonal timing.
Spring (March-May)
Ideal balayage season. As natural light increases, balayage becomes apparent. Schedule balayage in early spring (March) so summer sun enhances the effect. Spring hair typically has higher moisture content, improving bleaching safety. Plan for maintenance appointments every 8-10 weeks; next appointment would be May-June.
Summer (June-August)
Maximum balayage visibility. However, chlorine and UV exposure fade colour and can shift tones (particularly in blonde balayage). Use UV-protective sprays (£8-12) and rinse after swimming immediately. If balayage was done in spring, your next maintenance falls in July-August, perfect timing before returning to work or school in autumn.
Autumn (September-November)
Shorter days mean balayage appears less dramatic. Some people adjust their balayage timing, going warmer and deeper. Maintenance appointments every 8 weeks continue. October is a good secondary timing for balayage if you prefer more dramatic contrast against darker clothing typical of autumn.
Winter (December-February)
Least ideal season visually, but workable. Blue-grey winter light can make certain balayage tones appear cool or slightly muddy. If you must do balayage in winter, choose warm undertones that won’t shift unflatteringly. Dry winter air demands increased conditioning (2-3 times weekly deep treatments). Maintenance continues every 8 weeks; your next appointment would be February-March, conveniently resetting the cycle for spring.
Common Mistakes to Avoid
Over-Processing
The most common error is leaving lightener on too long, hoping for lighter results. Hair structure breaks down after 40 minutes at 20 volume. Gummy, stretchy, breaking hair indicates over-processing. Once damaged, hair cannot be repaired—only cut away. Stop processing at 35-40 minutes maximum, even if colour isn’t quite light enough. A second, gentler session 2 weeks later is safer than pushing one session too far.
Uneven Developer Strength
Mixing inconsistent developer ratios creates patchy lightening. Always measure carefully. Too much developer burns hair and scalp; too little leaves colour streaky. Invest in a small scale (£8-15) for accurate measuring if you’re serious about balayage.
Neglecting Roots and Ends Differently
Roots are naturally darker and process slower due to scalp heat. Ends are lighter hair and process faster. Apply lightener to ends first (15 minutes into processing), then refresh roots last. This ensures even results across the entire strand.
Insufficient Deep Conditioning
Skipping deep conditioning after lightening is false economy. It costs £5-10 but prevents the brittleness and breakage that necessitate expensive corrective cuts (£40-80). Condition immediately after rinsing and weekly thereafter for the first month.
How to Tone Balayage for Your Ideal Result
Lightening only removes pigment; toning adds desired colour and neutralises unwanted warmth. Blonde balayage naturally has yellow undertones after lightening. Toning adjusts this to your preference.
Semi-permanent toners (Wella T18, Schwarzkopf Igora Vibrance) last 12-24 shampoos and cost £4-8. They deposit colour without lifting, making them ideal for refining balayage between salon visits. Ash tones create cool, sophisticated blonde. Platinum tones create icy, dramatic blonde. Beige tones create warm, buttery blonde.
Leave toner on for 10-20 minutes, depending on desired intensity. Semi-permanent toner can’t damage hair—worst case, it washes out gradually and you reapply. This makes toning the safest way to adjust balayage results.
For brunette or caramel balayage, permanent toning might be necessary to achieve your exact shade. This requires a colourist’s expertise, as permanent colour adds lightening potential and complexity.
Maintenance: Keeping Your Balayage Fresh
Balayage maintenance extends beyond toning. Hair structure care determines how long balayage lasts and how healthy your hair remains.
Weekly Routine
Wash with colour-safe shampoo (targeting scalp and mid-lengths, not ends). Condition all hair, focusing on ends. Once weekly, apply deep conditioning treatment and leave it on 10-15 minutes. This routine costs roughly £15-20 monthly in products but dramatically extends balayage longevity.
Quarterly Protein Treatments
Every 8-12 weeks, apply protein-rich treatments (Olaplex, K18, SalonCare Protein Repair). These rebuild hair structure weakened by lightening and cost £12-25 per treatment. One quarterly treatment maintains hair strength.
Professional Maintenance
Schedule balayage refreshes every 8-10 weeks. Maintenance appointments cost £60-120 and involve toning, subtle re-balayaging to blend regrowth, and deep conditioning. This is significantly cheaper than initial balayage and keeps your colour looking fresh.
Balayage for Different Hair Types and Colours
Fine or Thin Hair
Lighter balayage actually makes thin hair appear fuller by creating contrast and movement. Use 10 volume developer and monitor closely—fine hair processes quickly. Space highlights further apart (30-40% coverage) to avoid appearing too sparse. Shorter processing times (20-25 minutes) prevent over-processing.
Thick or Coarse Hair
Thick hair needs more lightening product and longer processing. Divide into more sections (6-8 instead of 4) to ensure even lightener penetration. 20 volume developer processes faster in thick hair; some professionals use 30 volume for thick virgin hair (but never for previously lightened hair). Process 30-40 minutes; thick hair won’t lighten as much in standard timeframes.
Curly or Textured Hair
Curly hair’s structure means lightener processes faster in some areas than others. Apply lightener to curls from underneath, following the curl pattern. Process conservatively (25-30 minutes) as curly hair is often naturally drier. Deep condition intensively post-balayage; curls are prone to frizz when damaged by lightening.
Dark Hair (Levels 1-4)
Lifting very dark hair to blonde requires multiple sessions or professional processing. Level 1-2 hair might only lighten 2-3 levels per session. Plan for 2-3 sessions spaced 2-4 weeks apart if blonde balayage is your goal. Alternatively, aim for warm brunette or caramel balayage, which is achievable in one session and still stunning.
Previously Lightened Hair
If hair has been highlighted or balayaged before, use 10 volume developer exclusively. These areas are porous and process extremely fast. Monitor closely; processing time might be only 15-20 minutes. Strand test extensively as previously lightened hair can lighten unevenly or turn brassy.
Frequently Asked Questions
How long does at-home balayage take?
Preparation takes 10-15 minutes. Application takes 20-30 minutes. Processing takes 20-40 minutes depending on developer and hair type. Rinsing and conditioning takes 15-20 minutes. Total time is 60-105 minutes. Allow two hours total to avoid rushing.
Can I do balayage on damaged hair?
Not recommended. Hair showing signs of damage (split ends, breakage, excessive frizz) cannot withstand lightening. The bleaching process further compromises structure. Trim damaged ends 2-4 weeks before balayage. If overall condition is poor, deep condition weekly for 4 weeks before attempting balayage.
What’s the difference between balayage and highlights?
Highlights use foils to isolate sections, creating uniform placement and saturation. Balayage hand-paints colour with freehand placement, creating natural-looking dimension. Balayage grows out more naturally, avoiding harsh root lines. Highlights are more predictable but require more maintenance.
How often should I get balayage refreshed?
Every 8-10 weeks for optimal appearance. At this interval, regrowth is subtle and blends easily with new balayage application. Waiting longer than 12 weeks creates obvious roots and requires more dramatic repainting to maintain the effect.
Can I do balayage at home safely?
Yes, with careful preparation and realistic expectations. Professional balayage requires years of training; home balayage is trickier than foil highlights but achievable with patience. Start with subtle balayage (fewer highlights, conservative lightness) to learn the technique safely. If your goal is dramatic blonde transformation, professional application is worth the cost.
Conclusion: Mastering How to Balayage Hair
Learning how to balayage hair opens possibilities for dimensional, professional-looking colour that grows out naturally and flattens your features beautifully. The technique demands understanding hair science, careful product selection, precise application, and diligent aftercare—but mastering these elements delivers results rivalling £200+ salon visits.
Your success depends on honest assessment of your hair type, realistic expectations about lightness levels, and commitment to maintenance. A subtle, well-maintained at-home balayage genuinely outperforms an overly ambitious attempt that damages your hair. Start conservatively, learn from results, and refine your technique with each session.
Whether you’re motivated by cost savings, creative expression, or simply wanting control over your colour, balayage offers a sophisticated alternative to uniform highlighting. The sweeping, hand-painted technique that originated in France has become accessible to anyone willing to invest time in learning the process. Begin with your first strand test this month, plan your timing around seasonal light, and transform your hair with professional-quality dimension that looks nothing like artificial or obvious colouring.