How to Clean Hair Clippers Like a Professional
Contents:
- Why Clipper Maintenance Matters More Than You Think
- Daily Cleaning: The Foundation of Clipper Care
- The Immediate Post-Cut Brush
- The Weekly Alcohol Dip
- Weekly Deep Cleaning Sessions
- Disassembly and Soak Method
- Rinsing and Drying
- Blade Reassembly and Lubrication
- Comparing Clipper Cleaning Versus Trimmer Maintenance
- The Story That Changed One Barber’s Approach
- Professional Servicing: When to Call the Experts
- Storage Solutions for Maximum Longevity
- Troubleshooting Common Clipper Problems
- Clippers Running Hot or Making Strange Noises
- Blade Pulling Rather Than Cutting
- Clipper Won’t Hold Charge (for Cordless Models)
- Practical Tips from Years of Professional Experience
- FAQ: Answering Your Clipper Cleaning Questions
- How often should I clean my hair clippers?
- Can I use water to clean my clippers?
- What type of oil should I use on hair clippers?
- How do I know when my clippers need professional sharpening?
- Can clipper blades be replaced rather than sharpened?
- Master Clipper Maintenance and Extend Your Equipment’s Lifespan
Here’s something most people don’t realise: hair clippers can harbour up to 50,000 bacteria per square inch if left uncleaned. That’s more germs than you’d find on a typical kitchen sink. Whether you’re a barber performing multiple cuts daily or a home groomer maintaining family members’ fades, proper clipper maintenance isn’t just about hygiene—it’s about preserving your equipment investment and getting consistently sharp results.
Your clippers are precision instruments that deserve the same respect you’d give to any valued tool. When you understand how to clean hair clippers correctly, you protect both your clients and your equipment, extend blade longevity from months to years, and maintain that crucial performance edge that separates amateur results from professional outcomes.
Why Clipper Maintenance Matters More Than You Think
Hair clippings, drying oils from scalp contact, and bacteria accumulation happen within minutes of use. The moment your blades cut through hair, they begin collecting residue in the tight spaces between teeth and along the cutting edges. This buildup doesn’t just look unpleasant—it actively damages your clippers in ways that become expensive quickly.
According to Marcus Hellewell, a certified trichologist at the British Institute of Hair Sciences, “I’ve examined hundreds of clippers brought in for repair, and ninety percent of blade dulling stems from inadequate cleaning protocols. Hair proteins, skin oils, and oxidation accelerate wear rates dramatically. A well-maintained clipper set can deliver eight to ten years of reliable service, while neglected ones fail within eighteen to twenty-four months.”
The cost difference is staggering. A quality professional clipper set in 2026 runs between £150 and £450. Replacing that set every couple of years versus every decade represents thousands of pounds in unnecessary expense. Beyond cost, dull blades pull hair rather than cutting cleanly, creating an uncomfortable experience for anyone receiving a cut and potentially causing clipper burn.
Daily Cleaning: The Foundation of Clipper Care
Your daily routine should take no more than three to five minutes but makes an enormous difference in clipper performance. This happens immediately after use, while hair and oils remain fresh and easier to remove.
The Immediate Post-Cut Brush
After finishing each haircut, brush away loose hair clippings using a small clipper brush or old toothbrush. Work bristles between the blade teeth in multiple directions—top to bottom, side to side, and at slight angles. This removes the bulk of cut hair before it dries and becomes stubborn to shift. Spend about thirty seconds on this step. Many people skip this thinking they’ll clean everything later, but dried hair requires considerably more effort to dislodge.
Keep a designated clipper brush next to your workstation. A soft-bristled brush won’t damage blade edges like metal brushes could. You can find quality clipper brushes for £3 to £8 at most beauty supply shops or online retailers.
The Weekly Alcohol Dip
Once or twice weekly, depending on usage frequency, give your clippers a proper cleaning with clipper oil and cleaning liquid. The most effective approach uses 99% isopropyl alcohol—available from pharmacies for around £4 to £6 per bottle. Place a small container of isopropyl alcohol on your workstation and briefly dip your running clipper blades into it for five to ten seconds. The alcohol dissolves oils and kills bacteria instantly whilst the blade motion helps flush away debris.
Important safety note: Only dip the blade area, never the motor housing. Let the clipper run for a few seconds after removal so excess alcohol drains away and evaporates.
Some professionals prefer clipper disinfectant solutions specifically formulated for this purpose, containing ingredients that both clean and condition blades. These products typically cost £8 to £15 per litre and tend to be gentler on blade metals than pure alcohol. Popular UK brands include ClipperCare and BarberPro.
Weekly Deep Cleaning Sessions
Beyond daily maintenance, dedicate time weekly for a thorough blade cleaning that reaches every crevice. This removes buildup that daily brushing misses and prevents the gradual performance decline that catches professionals off-guard.
Disassembly and Soak Method
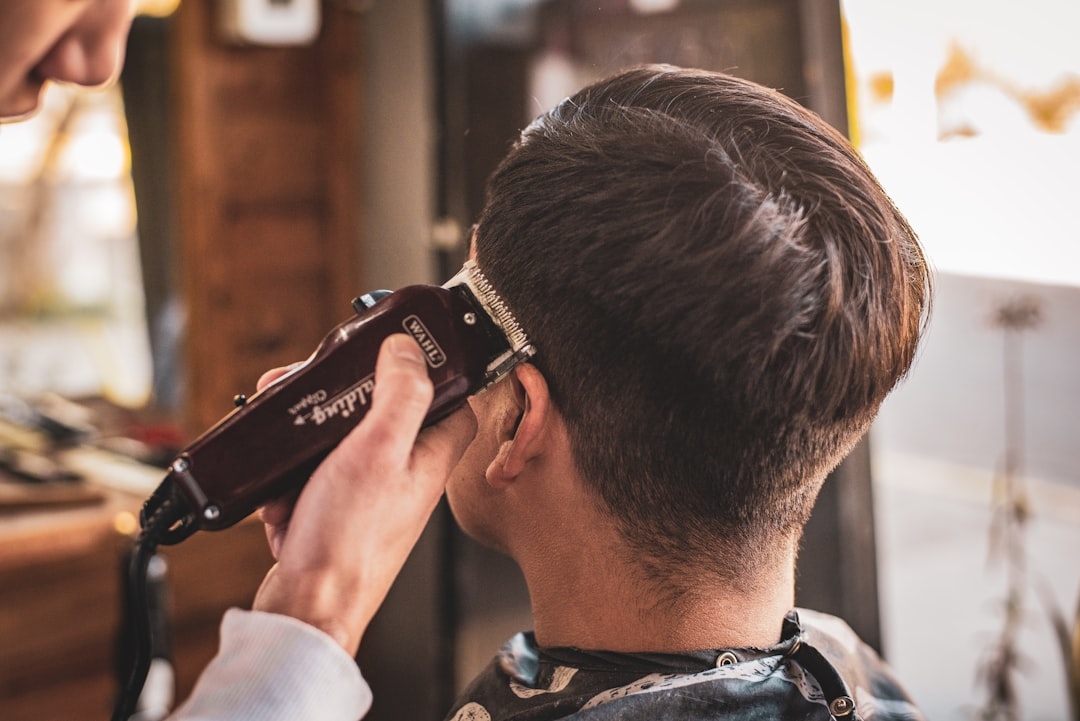
If your clipper model allows easy blade removal—and most quality models do—unscrew the blade assembly carefully. Check your instruction manual for the correct procedure, as methods vary slightly between brands. Wahl, Andis, and Oster (the market leaders with UK pricing typically between £80 and £200 per clipper) all feature accessible blade systems.
Create a cleaning solution using warm (not hot) water with a small amount of clipper oil or a few drops of liquid soap. Soak the blade assembly for five minutes. This loosens stubborn hair and oil buildup. Use an old toothbrush or small cleaning brush to gently scrub between blade teeth. Pay particular attention to the areas where the two blade plates meet, as hair frequently lodges there.
Never use harsh scouring pads or steel wool. These scratch the blade surface and create tiny grooves where bacteria can nest. Your goal is gentle but thorough.
Rinsing and Drying
Rinse the disassembled blades thoroughly under lukewarm running water. Hold them under a light source and check that no hair strands remain between the teeth. After rinsing, pat dry immediately with a clean, lint-free cloth. Moisture left on blades promotes rust formation, particularly on older stainless steel models. Air-dry for an additional five minutes if time permits.
Blade Reassembly and Lubrication
Once completely dry, apply a thin coat of clipper oil to the blade teeth and moving parts. This is crucial. Clipper oil does two things: it reduces friction between blade components (keeping your clippers running smoothly and quietly) and it provides a protective barrier against moisture. Brands like Andis Blade Care and Wahl clipper oil cost around £5 to £8 per bottle and last months with regular use.
Apply oil sparingly—just a light coating. Excess oil attracts hair and dust. Run the clippers for several seconds to distribute the oil evenly across blade surfaces. Wipe away any excess with a cloth. Your blades should look slightly glossy but not wet or dripping.
Comparing Clipper Cleaning Versus Trimmer Maintenance
People frequently confuse proper clipper cleaning with the lighter maintenance required for electric trimmers. These are fundamentally different tools with different care needs, and treating clippers like trimmers leads to premature blade failure.
Hair clippers feature multiple blade teeth that interlock and create a cutting action. They’re built for longer, thicker hair and handle continuous heavy-duty use. They require thorough regular cleaning, frequent oiling, and occasional professional servicing.
Electric trimmers typically have a rotating or oscillating single blade designed for lighter detail work around edges and sideburns. They generate heat more readily and require less elaborate maintenance. A quick brush and occasional light oil suffice for trimmers, whereas clippers demand the comprehensive approach described here.
Using trimmer-level maintenance on clippers is like servicing a professional chainsaw with the care schedule for a pocket knife. You’ll damage expensive equipment through neglect.
The Story That Changed One Barber’s Approach
Derek, a barber in Manchester, was frustrated with blade dullness after just eight months of ownership on his premium Andis clippers—a £280 investment. He’d brush them casually after each cut and occasionally dipped them in water, but never followed a structured cleaning routine. His blades started pulling hair, frustrating both him and his clients. A colleague eventually spent twenty minutes showing him the proper weekly soaking and oiling process. Within a month of consistent maintenance, Derek’s clippers felt sharp again. Three years later, those same clippers still perform excellently because he now dedicates ten minutes weekly to proper care. “I thought I was saving time by skipping deep cleaning,” he says. “Turns out I was just guaranteeing expensive replacements.”
Professional Servicing: When to Call the Experts
Despite perfect home maintenance, clippers eventually need professional servicing. Blade edges eventually dull through normal use, internal springs weaken, and motors lose power. Professional blade sharpening typically costs £15 to £30 per pair and can restore older clippers to near-new performance.
Professional sharpening uses specialized equipment that recreates the precise blade angles that consumer maintenance cannot achieve. Many beauty supply retailers offer this service, or you can mail clippers to specialist services across the UK. Annual professional servicing, especially for clippers receiving heavy daily use, extends equipment life considerably.
Storage Solutions for Maximum Longevity
Where you store your clippers between uses matters as much as how you clean them. Moisture and dust are your enemies.
Store clippers in a cool, dry location away from humidity. Bathroom storage is problematic—moisture from showers and baths accelerates rust and corrosion. A bedroom closet or dedicated shelf in your barber room is ideal. If you work in a humid environment, consider a small airtight storage container with moisture-absorbing packets (silica gel packets work perfectly and cost around £5 for a pack of twenty).
For protection during storage, some professionals apply a light coat of clipper oil as a final protective step. This isn’t necessary if your clippers are stored in a truly dry environment, but it provides extra insurance against unexpected humidity fluctuations.
Troubleshooting Common Clipper Problems
Clippers Running Hot or Making Strange Noises
Overheating usually indicates inadequate lubrication. Apply fresh clipper oil and run the clippers for thirty seconds. If the problem persists, internal damage may have occurred and professional servicing is needed.
Unusual grinding or rasping sounds often mean hair has wrapped around internal components or the blade alignment has shifted. Disassemble and clean thoroughly. If noise continues, professional repair is warranted.
Blade Pulling Rather Than Cutting
Dull blades are the culprit here. Try professional sharpening or blade replacement if sharpening isn’t available. Some clippers accept replacement blade packs for £20 to £50 depending on the model, making this more cost-effective than purchasing entirely new clippers.
Clipper Won’t Hold Charge (for Cordless Models)
This typically indicates battery degradation rather than a cleaning issue. Cordless clipper batteries generally last two to three years with regular use. Replacement batteries cost £30 to £80 depending on model and capacity.
Practical Tips from Years of Professional Experience
- The thirty-second rule: Spend thirty seconds brushing clippers immediately after each use. This single habit prevents ninety percent of stubborn buildup problems.
- Create a maintenance station: Keep your clipper brush, alcohol, clipper oil, and cleaning cloths in one dedicated spot. Friction-free access means you’ll actually maintain your clippers consistently.
- Mark your maintenance calendar: Set a weekly phone reminder for deep cleaning. This prevents months-long gaps where dust and debris accumulate unchecked.
- Never leave clippers wet: Always dry them completely immediately after cleaning. Even “fully dried” blades benefit from sitting exposed to air for five to ten minutes.
- Use distilled water for final rinses: Tap water contains minerals that can leave residue on blades. A one-litre bottle of distilled water costs £1 to £2 and makes a noticeable difference.
- Invest in a quality brush: Don’t use whatever brush you find lying around. A proper soft-bristled clipper brush is inexpensive and lasts years, preventing accidental blade damage.
FAQ: Answering Your Clipper Cleaning Questions
How often should I clean my hair clippers?
Brush away loose hair after every single use (thirty seconds). Perform a weekly deep clean with disassembly and soaking. If you use clippers professionally, consider brief alcohol dips between clients on heavy workdays.
Can I use water to clean my clippers?
Lukewarm water is acceptable for rinsing during deep cleaning sessions, but it’s not sufficient as your only cleaning method. Water alone doesn’t dissolve oils. Isopropyl alcohol or clipper-specific cleaning solutions are far more effective. Always dry clippers thoroughly after any water exposure.
What type of oil should I use on hair clippers?
Use only clipper oil or light machine oil specifically formulated for grooming equipment. Never use cooking oils, automotive oils, or general-purpose lubricants. These are too thick, attract dirt, and can damage precision blade components. Proper clipper oil costs £5 to £8 per bottle and lasts months.
How do I know when my clippers need professional sharpening?
If blades pull hair rather than cutting cleanly despite proper cleaning and oiling, sharpening is needed. You’ll notice this immediately—clients will comment that cutting feels uncomfortable, and you’ll need to make multiple passes over the same area. Professional sharpening costs £15 to £30 and restores performance dramatically.
Can clipper blades be replaced rather than sharpened?
Many clipper models accept replacement blade assemblies. Check your clipper’s documentation to see if blades are replaceable. If so, replacement costs £20 to £50 and takes seconds to install. If your model has fixed blades, professional sharpening is your option.
Master Clipper Maintenance and Extend Your Equipment’s Lifespan
Learning how to clean hair clippers properly transforms your relationship with these essential tools. What begins as a three-minute daily habit compounds into years of reliable performance and sharp, consistent results. Your clippers aren’t just equipment—they’re investments in your craft, whether you’re a professional barber or enthusiast maintaining fades for family and friends.
Start this week: establish your daily post-cut brush routine, set a calendar reminder for weekly deep cleaning, and invest in proper supplies—a soft clipper brush, isopropyl alcohol, and quality clipper oil. That modest upfront investment of £15 to £25 delivers thousands of pounds in protection and extended equipment life. The next time someone comments that your clipper work feels exceptionally sharp and comfortable, you’ll know that meticulous maintenance is doing its job.